

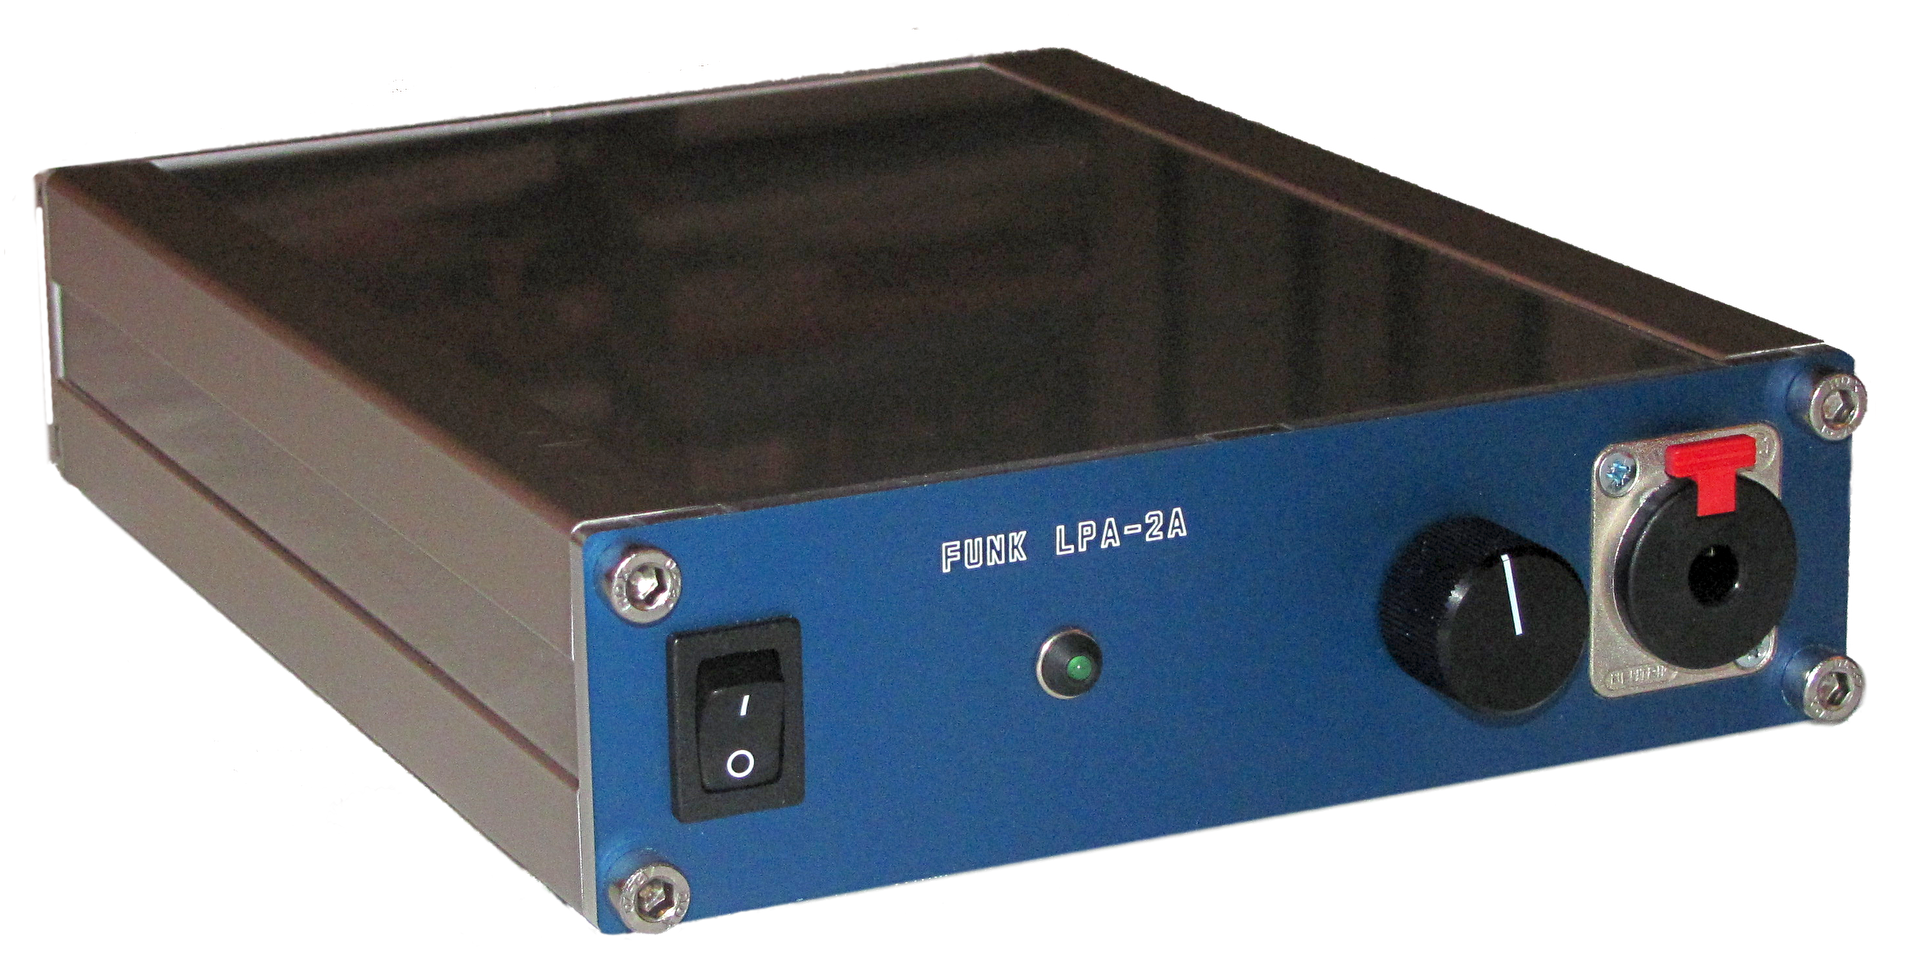
Recently I built myself a High-End DIY headphone amplifier, which is based on modules from german manufacturer Funk Tonstudio Technik. The amp has balanced XLR input sockets and a standard unbalanced stereo headphone output. DIY means: the headphone amp, the unbalancing amplifier and the power supply modules are from Funk, the rest: case, inputs, outputs, connections, soldering, etc. is all DIY.
Pictures
Specifications And Price
The LPA-2a has excellent specifications. Regarding specs it’s one of the best, if not the best, headphone amp available. Soundwise it’s optimized for purest transparency, so no colorful analogue sound here. Since a stepped ALPS attenuator is used, the stereo-balance is very good. The unbalancing board and the power supply module also have execellent specs. And the best thing: in relation to the quality the modules are relatively cheap (round about 250 €, the price for the case and other DIY stuff is round about 150€. That said: there are much cheaper cases available).
Module specifications:
- Headphone amp Funk LPA-2a
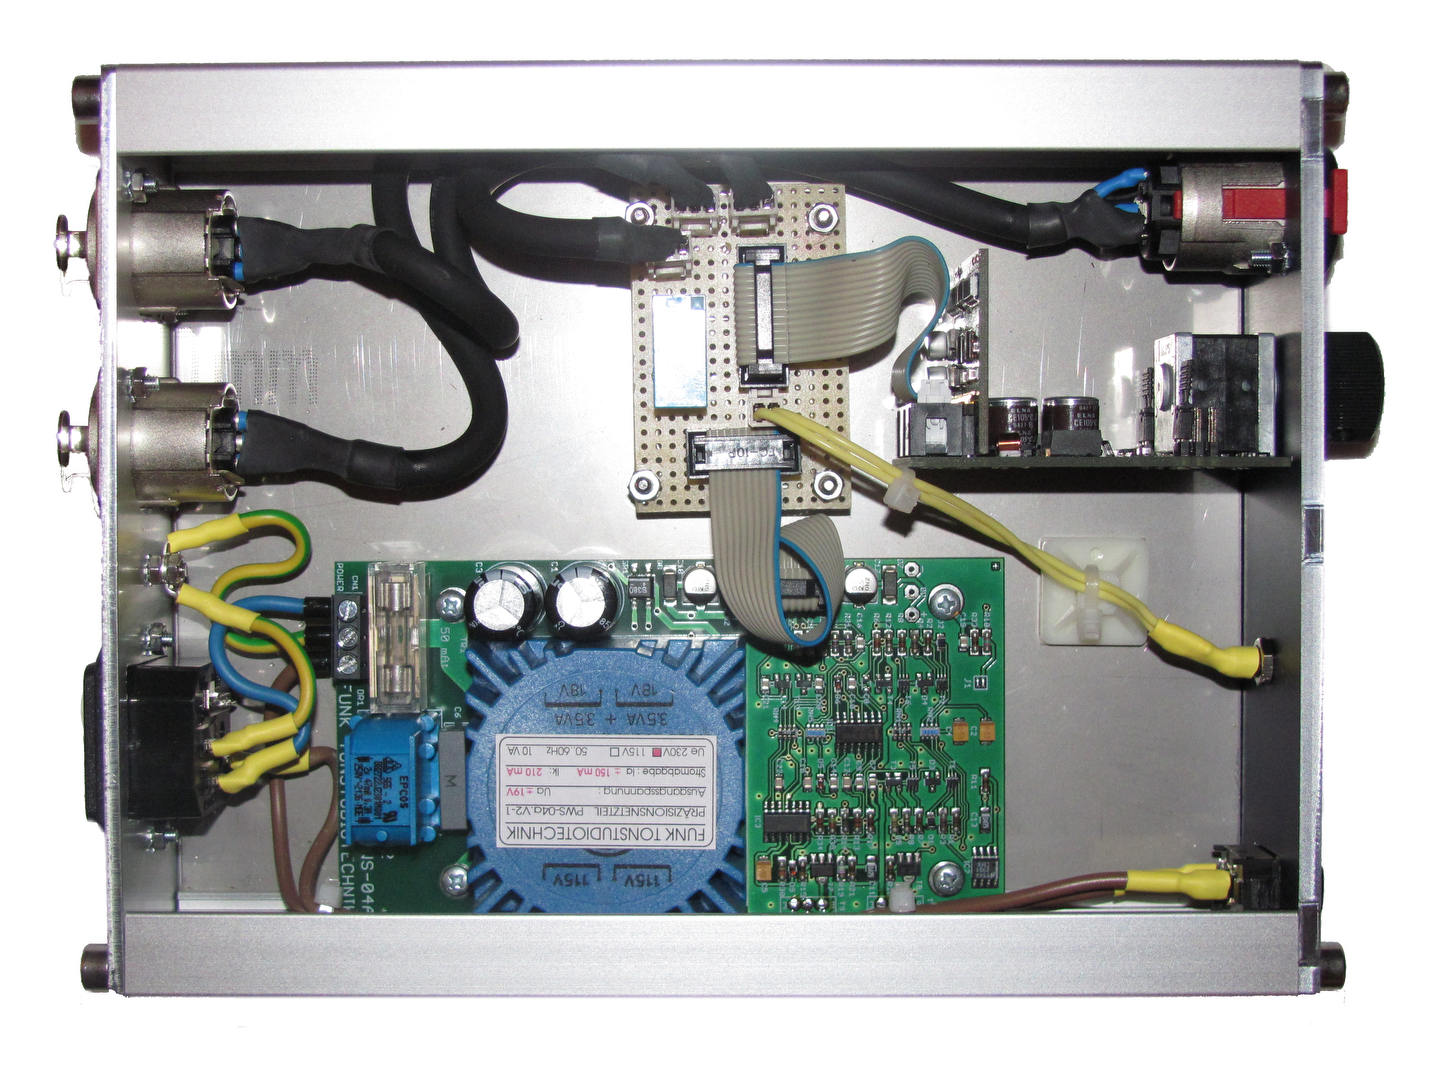
- Unbalancing amplifier board Funk SIA-5.V2. This board is packed onto the LPA-2a
- Power supply Funk PWS-04a_V2-1
The Case
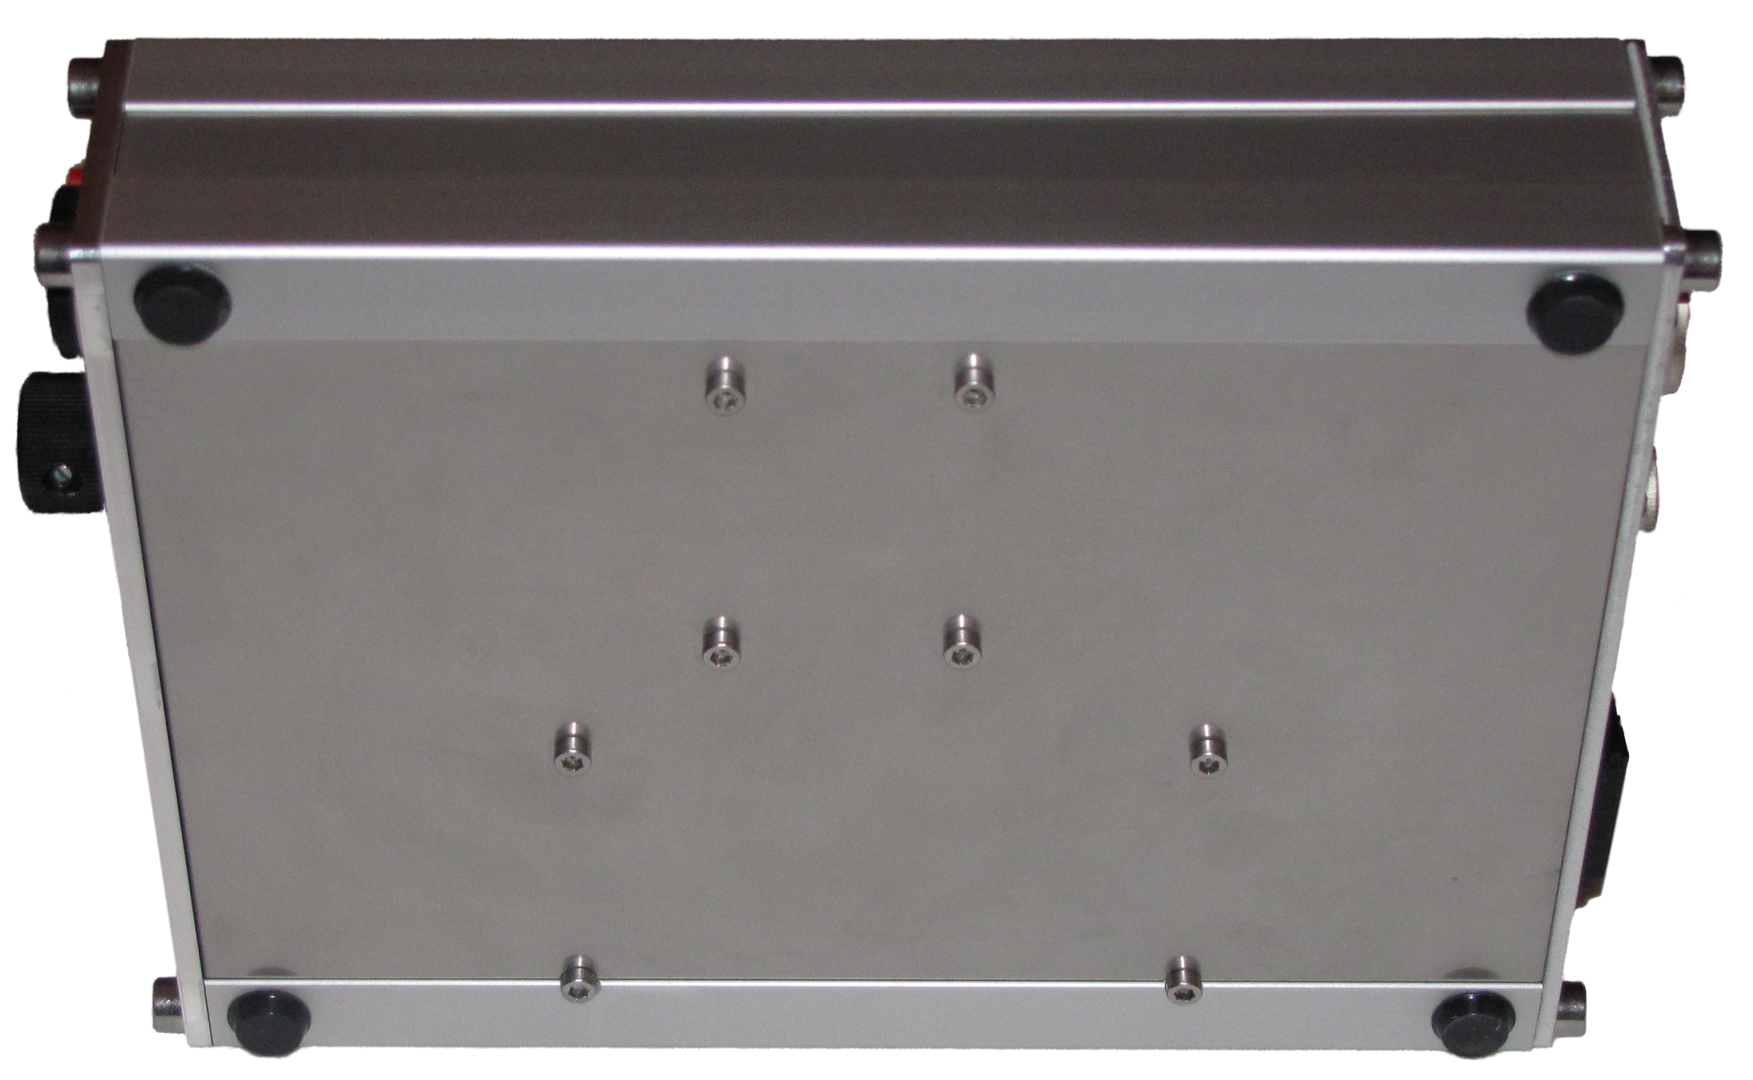
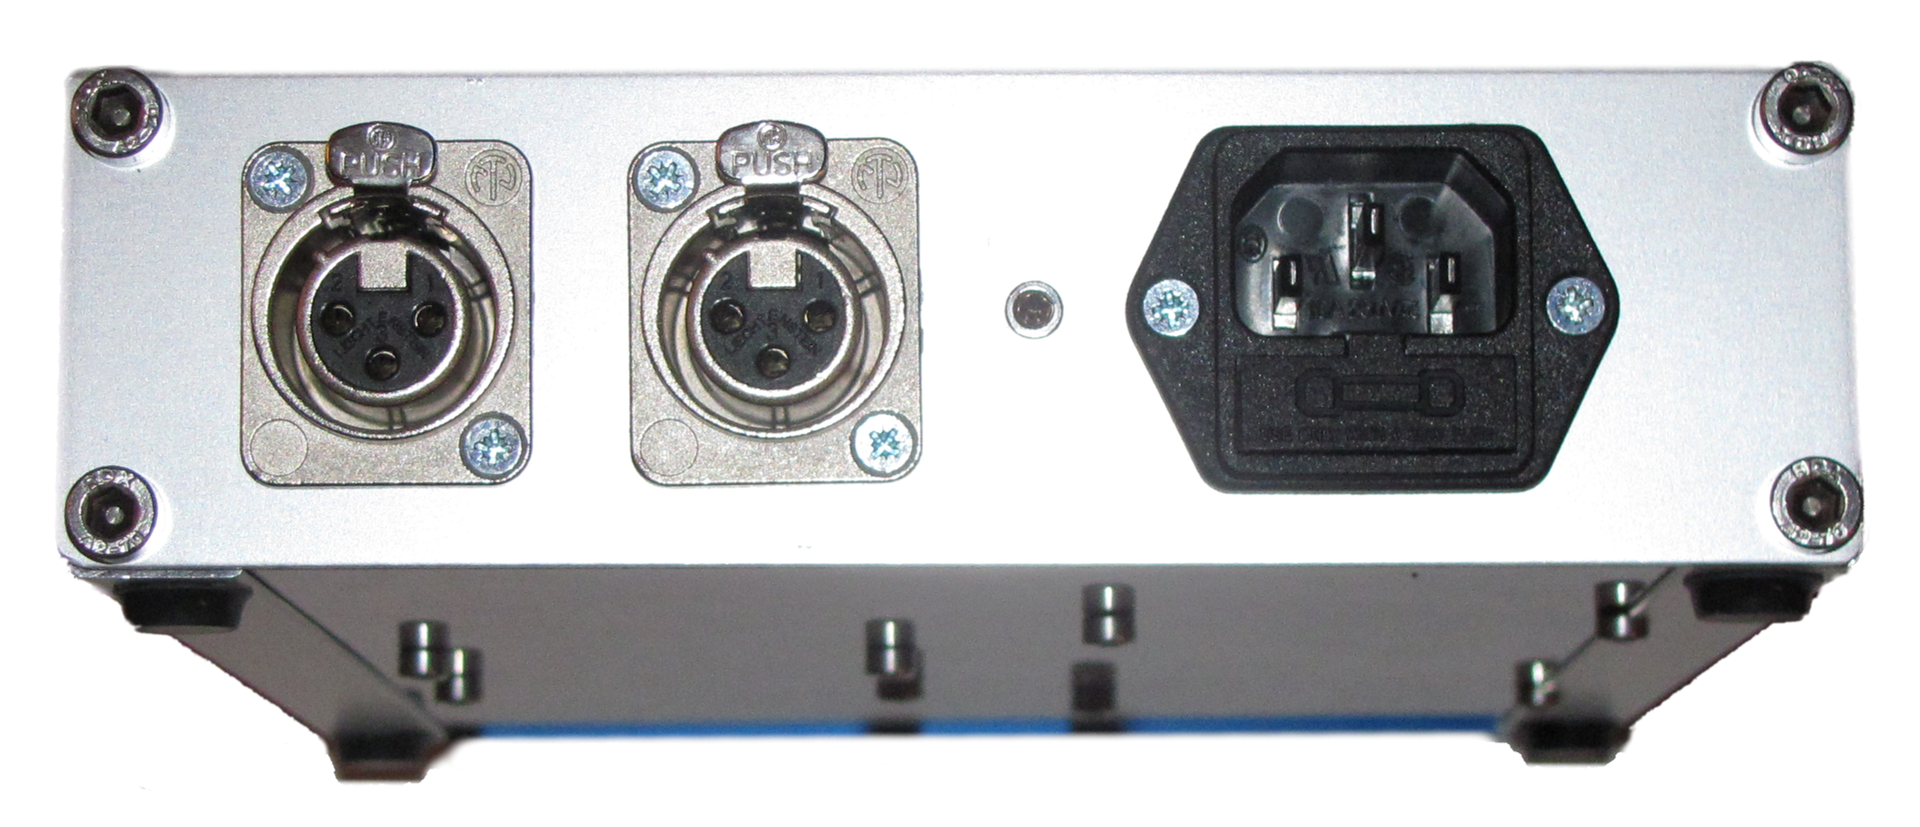
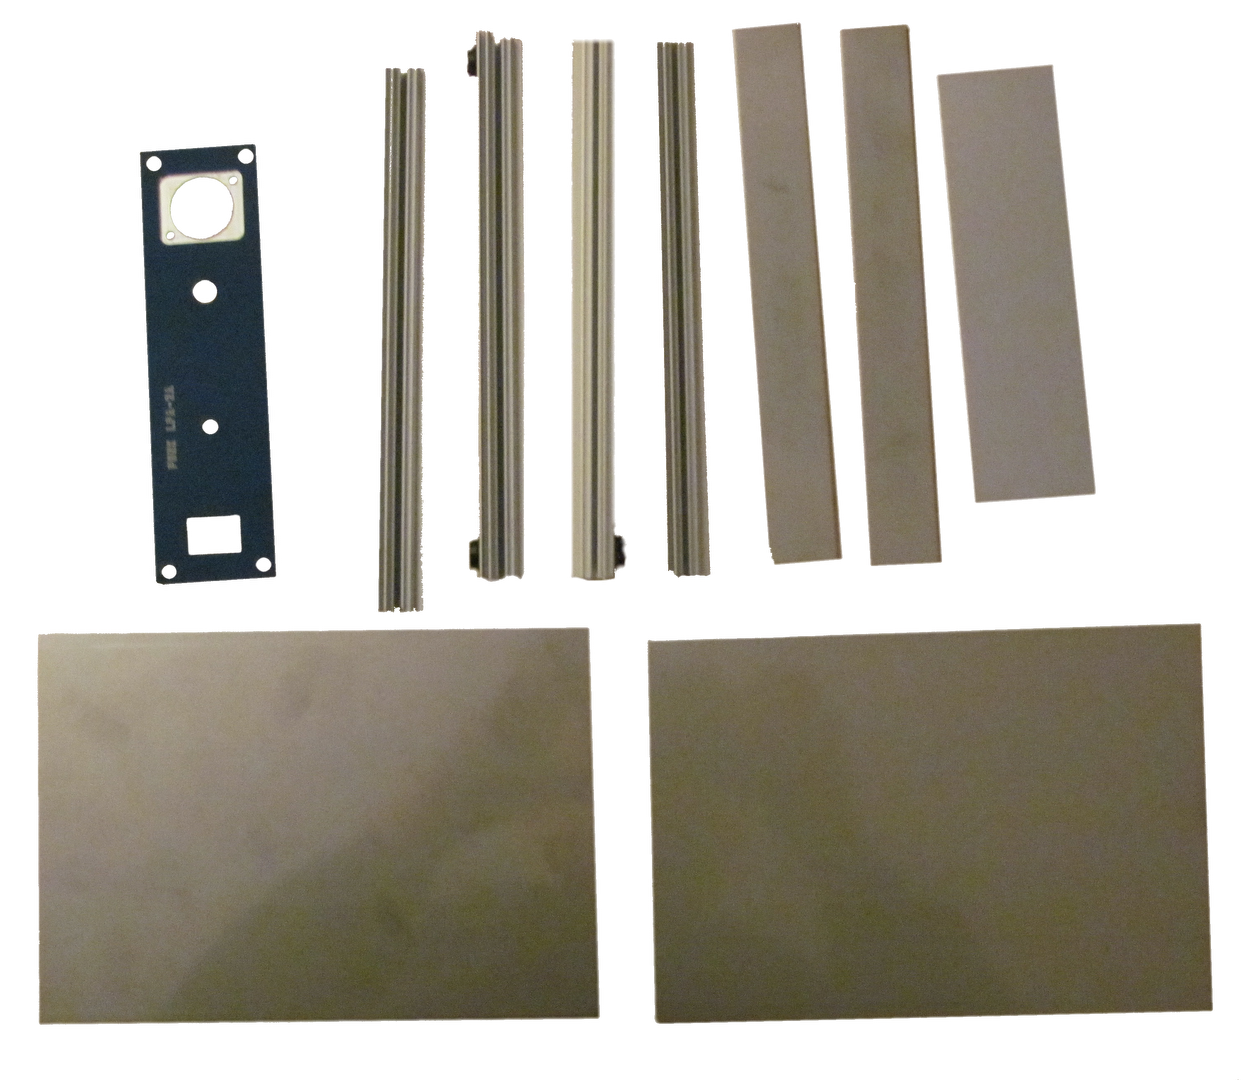
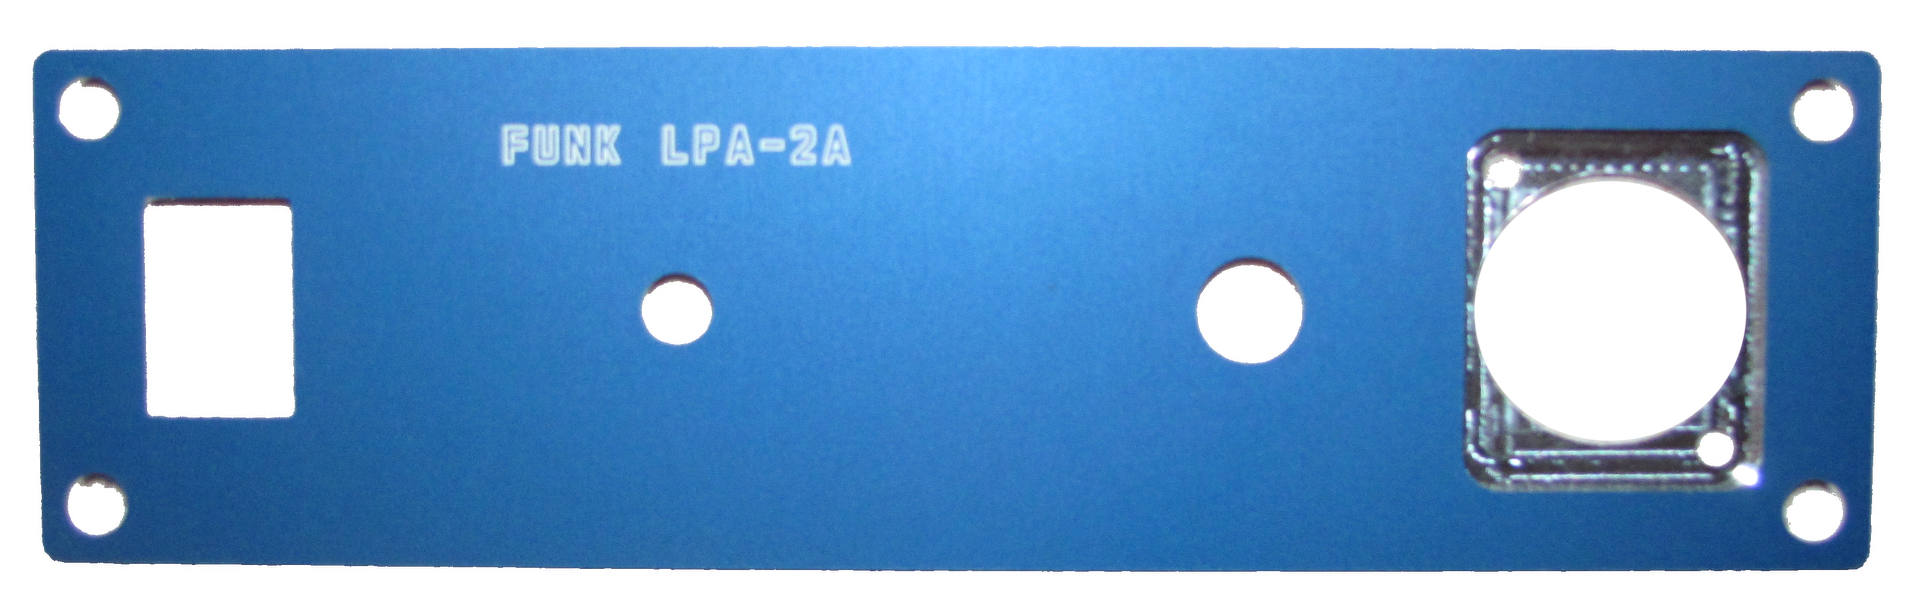
The case was designed using Frontplatten Designer by Schaeffer AG. Means: the aluminium front plate was milled by Schaeffer AG, also the corner aluminium profiles are from Schaeffer AG. The rest of the case was made from various pieces of sheet metal from blechscout.de. That was much cheaper than ordering directly from Schaeffer AG. Top, bottom and side sheets are 2mm stainless steel. The back plate is a 3mm aluminium sheet. I drilled all holes of the back plate by myself (cheaper). For mounting I used stainless steel hexagon socket screws.
Electrical Components
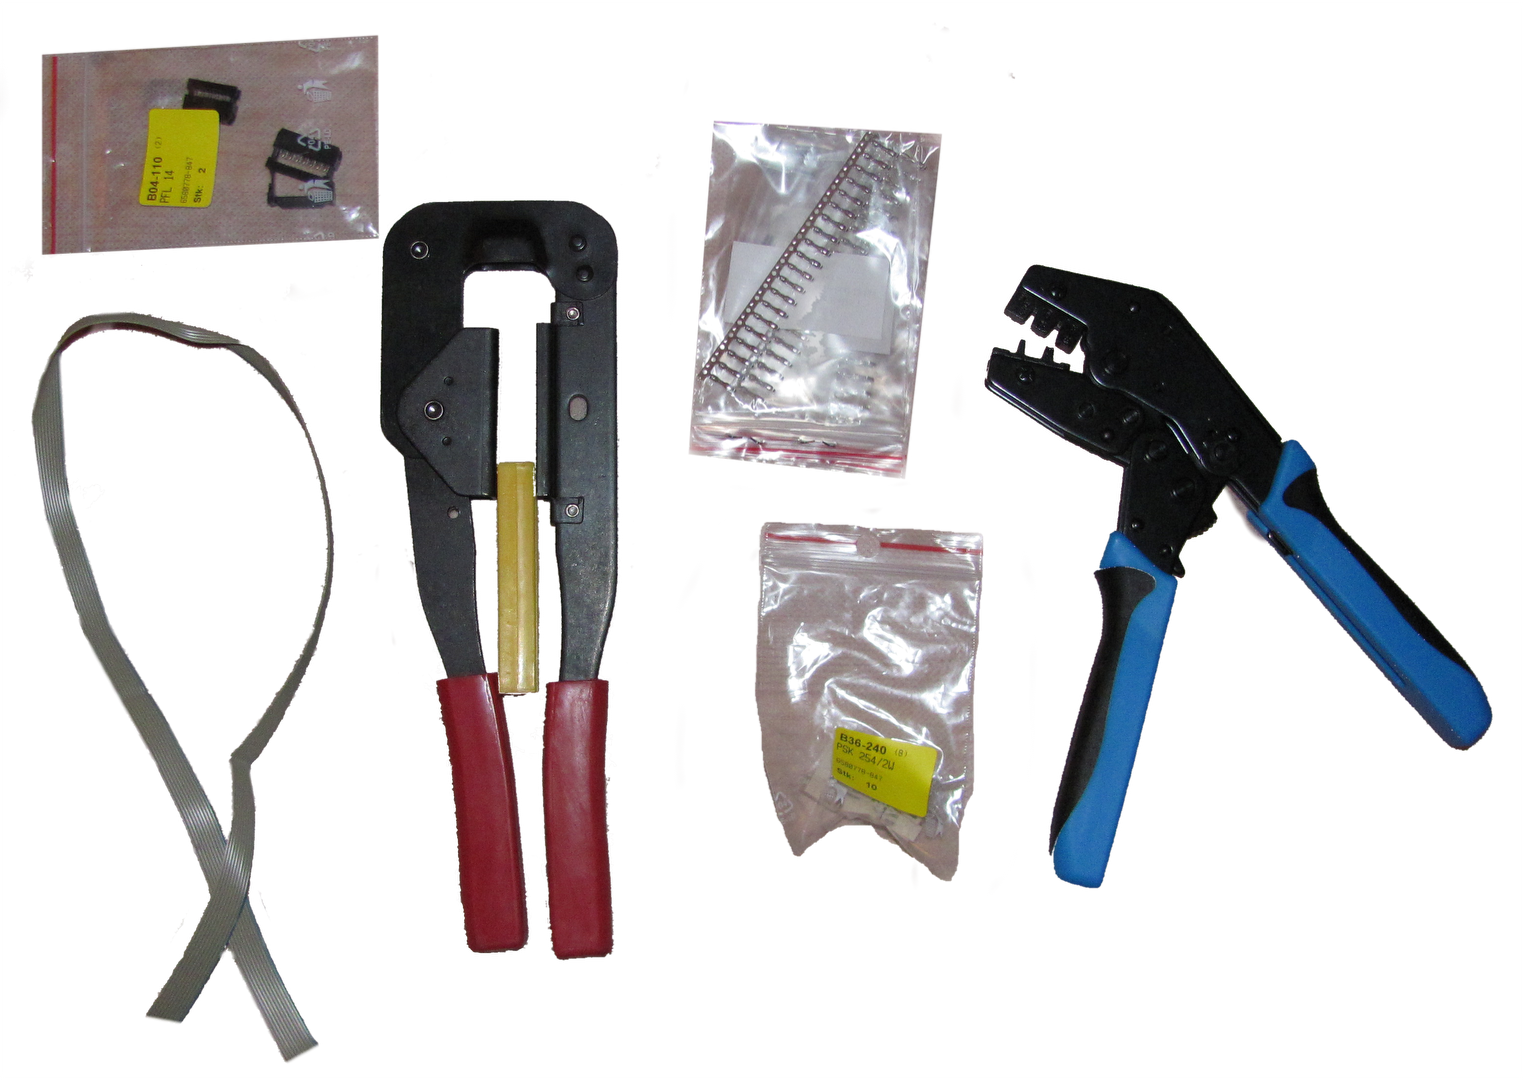
Electrical components are the already described Funk modules, various Neutrik signal I/O sockets, power socket, on/off switch, power led, cables and stuff. Finally there’s a DIY connector board that connects everything together (see details below). To assemble the cables some special tools / crimping tools are needed, or at least it’s helpfull to use them.
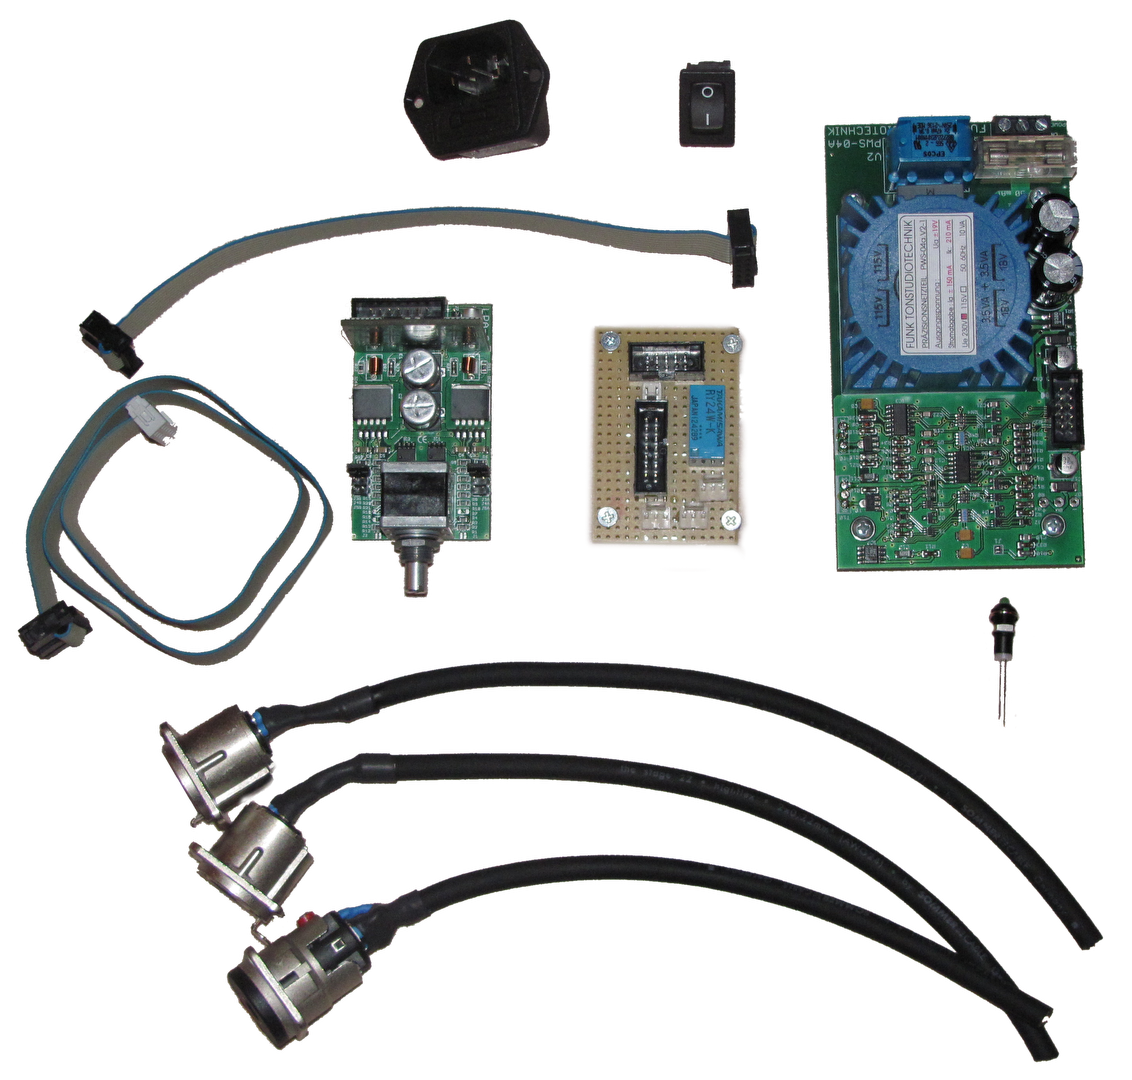
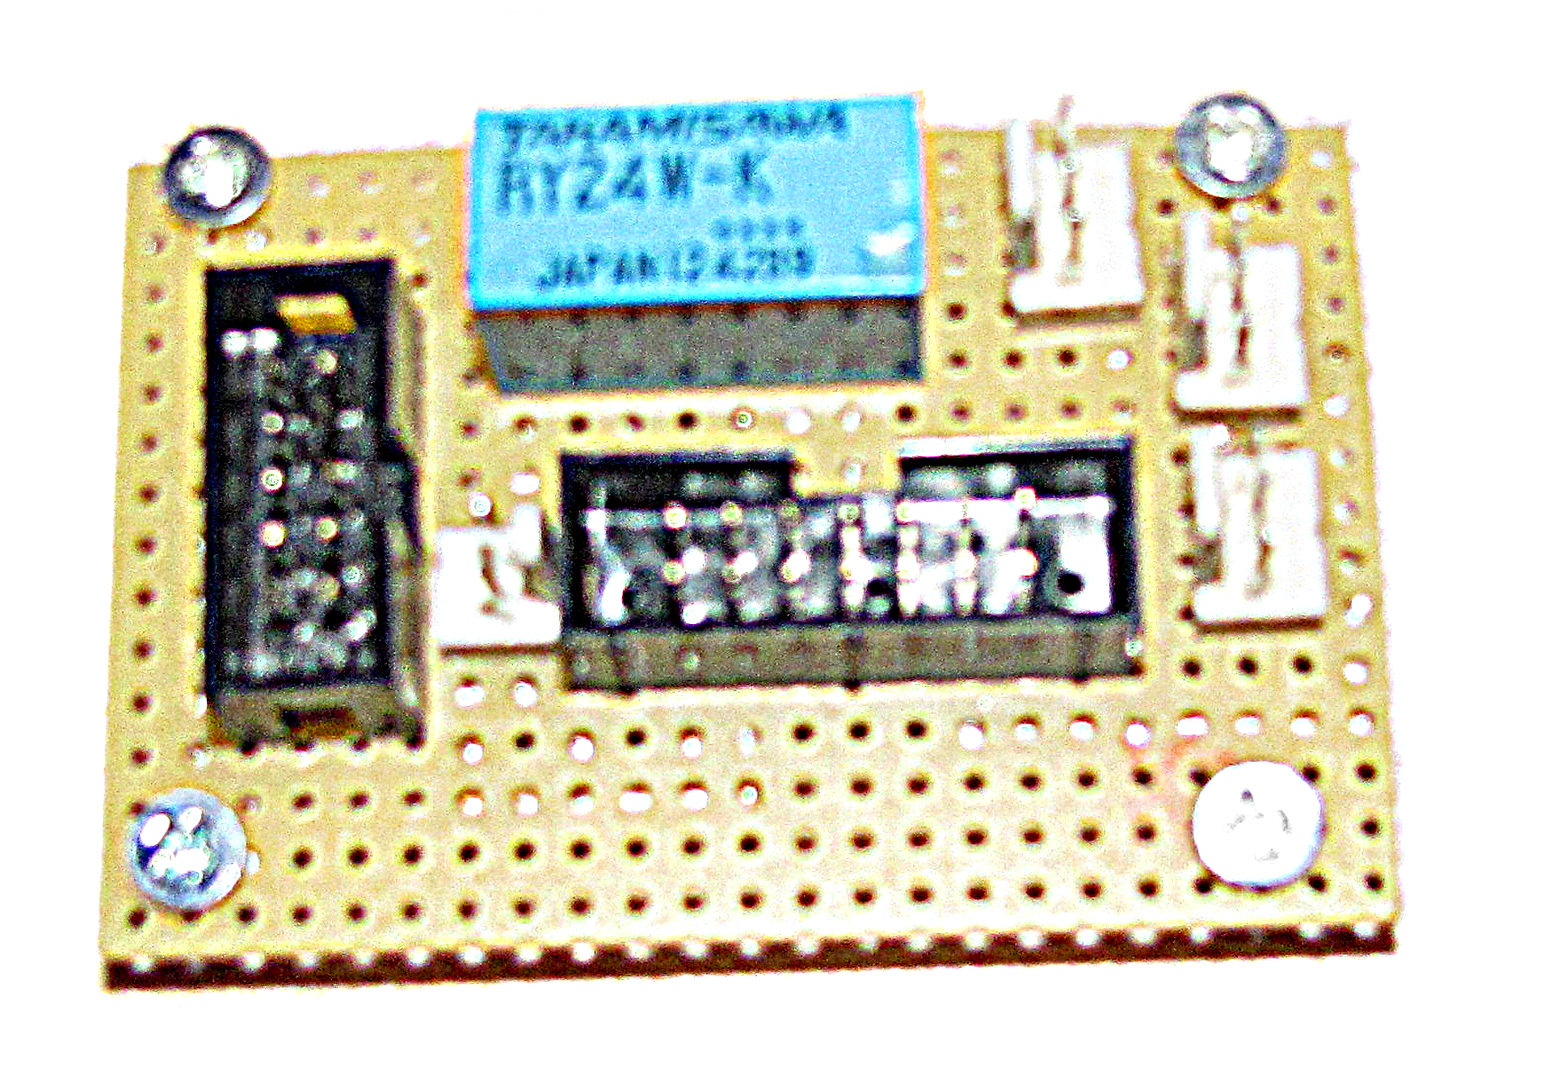
Connector Board
In order to connect the power supply, amp and I/Os, I soldered a slightly modified version of Peter Rill’s LPA-2 connector board. Thanks to Peter for the scheme ! Peter’s design also includes a relay which switches on/off the output signal. The relay is controlled by the Funk power supply. Means: 5 seconds after switching on the power supply, the relay closes, and as soon as the power supply is switched off, the relay opens. This protects your headphones and ears from nasty pops and clicks.

Adjustable Amplification
Depending on the used headphones the LPA-2a and the SIA-5 support various amplification settings ranging from -6 dB … + 18 dB. For more details see specifications.
8 Responses to DIY Headphone Amp Funk LPA-2a